This is a note on how to install the drivers for the NVIDIA GeForce GTX 1050 TI mobile on Fedora 28 running on a Dell XPS 9570.
To my dismay, it seems I was unsuccessful in installing these drivers from a variety of sources (rpmfusion or Nvidia) on the UEFI enabled boot system. I did attempt to sign them as I have signed other drivers in the past, such as vboxdrv and others... I could not get this to work. So I gave up on UEFI and disabled it in the BIOS - which I don't really enjoy doing.
So, once UEFI was disabled, this is how I installed the drivers on my Fedora 28 installation. Note that I followed the instructions from: https://ask.fedoraproject.org/en/question/119588/nvidia-driver-doesnt-work-for-dell-inspiron-15-7000-gaming-ee-no-devices-detected-ee-no-screens-foundee/
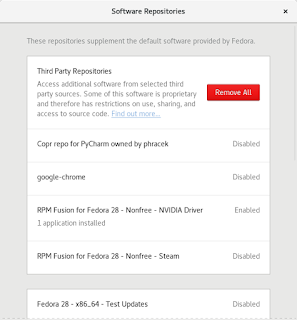
First I installed the third party repositories from the Gnome Software center:
I enabled the "RPM Fusion for Fedora 28 - Nonfree - NVIDIA Driver" repo. The next step is important because rather than installing it simply from the Gnome Software app, I preferred having the DNF history so I installed it using these commands:
$ sudo dnf install xorg-x11-drv-nvidia akmod-nvidia xorg-x11-drv-nvidia-cuda
$ sudo dnf update -y
Note that the 2nd command was superfluous in my case as my system was already updated with the latest drivers, kernel-devel libraries and dkms.
Fortunately this worked like a charm. Kudos to the Fedora team, RPM Fusion, and the community members as well as the OP on the above link for ensuring this all works, and figuring out the 'issues' with the driver installation.
Too bad I couldn't get this to work on UEFI.
